
Changing, adding and disabling L1 cache – VSAN for vSphere
- Guidance
- June 14, 2022
- Download as PDF
More information about L1 сache is available on the link: https://knowledgebase.starwindsoftware.com/explanation/starwind-virtual-san-l1-and-l2-caches-operational-principles/
NOTE: It is not recommended to configure cache in Write-Back mode on Standalone devices in order to avoid possible data corruption upon power outage or incorrect service shutdown.
Disabling cache
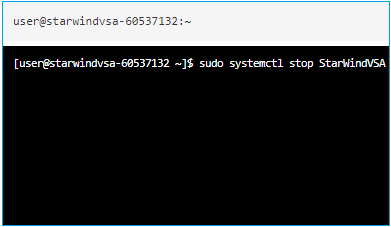
1. Stop the StarWind service.
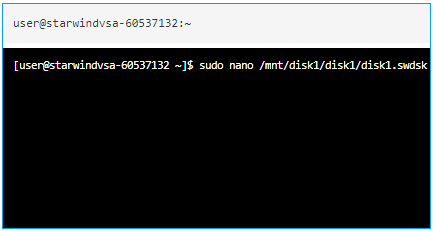
2. Check the path to the .swdsk file(s) in StarWind Management Console. It is in the same folder which contains the .img file.
For example, VSA Storage\mnt\disk1\disk1.
3. Open the folder containing the *.swdsk StarWind device header file(s). Please make sure that there is a copy of the .swdsk files before editing them:
4. These are the lines to be removed from *.swdsk device header file(s):
       <caching>
         <cache type="write-back" size="128" units="MB" level="1">
           <storages>
             <storage_ref id="1"/>
           </storages>
         </cache>
       </caching>
and
       <storage id="1" name="RAM" type="RAM">
         <interval size="128" units="MB"/>
       </storage>
NOTE: Units and size values may differ from the ones provided in the above example.
5. Save the file(s).
6. Start the StarWind service.
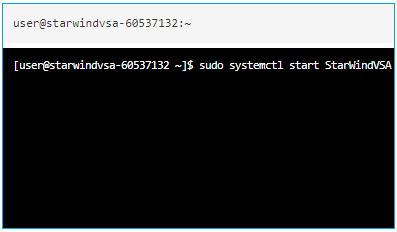
Wait for synchronization to complete, then repeat the same steps on the other node(s).
Changing cache size and type
1. Stop the StarWind service.
2. Check the path to the .swdsk file(s) in StarWind Management Console. It is in the same folder which contains the .img file.
For example, VSA Storage\mnt\disk1\disk1.
3. Open the folder containing the *.swdsk header file(s). Please make sure that there is a copy of the .swdsk files before editing them:
4. These are the lines to be edited from *.swdsk header file(s):
 <caching>
         <cache type="write-back" size="128" units="MB" level="1">
           <storages>
             <storage_ref id="1"/>
           </storages>
         </cache>
       </caching>
and
<storage id="1" name="RAM" type="RAM">
         <interval size="128" units="MB"/>
       </storage>
where:
| Parameter | Value | Description |
|---|---|---|
| cache type | write-through | Storage method in which data is written into the cache and the corresponding main memory location at the same time. The cached data allows for fast retrieval on demand, while the same data in main memory ensures that nothing gets lost if a crash, power failure, or other system disruption occurs. |
| write-back | During idle machine cycles, the data are written from the cache into memory or onto disk. Write back caches improve performance, because writing to the high-speed cache is faster than to normal RAM or disk. Using write-back cache for disks adds a slight amount of risk, because the data remain in volatile memory longer. | |
| size | {value} | Cache size in the corresponding units “MB”, “GB”. |
| storage_ref id
storage id |
{value}
{value} |
“Storage id” and “storage_ref id” should be the same for device type, but differ from 1, because the main device storage has this reference index. You can set this number to 3 or 4, for example. |
NOTE: Units and size values may differ from the ones provided in the above example.
5. Save the file(s).
6. Start the StarWind service.
Wait for synchronization to complete, then repeat the same steps on the other node(s).
Adding cache
1. Stop the StarWind service.
2. Check the path to the .swdsk file(s) in StarWind Management Console. It is in the same folder which contains the .img file.
For example, VSA Storage\mnt\disk1\disk1.
3. Open the folder containing the *.swdsk header file(s). Please make sure that there is a copy of the .swdsk files before editing them:
NOTE: “Storage id” and “storage_ref id” should be the same for device type, but differ from 1, because the main device storage has this reference index. You can set this number to 3 or 4.
These are the lines to be added to both .swdsk HA and image header files of the device:
- After the closing </geometry> tag:
 <caching>
          <cache type="write-back" size="128" units="MB" level="1">
            <storages>
              <storage_ref id="4"/>
            </storages>
          </cache>
</caching>- After the <storages> tag which is below the <resources> tag:
 <resources>
          <storages>
            <storage id="4" name="RAM" type="RAM">
              <interval size="128" units="MB"/>
            </storage>
where:
| Parameter | Value | Description |
|---|---|---|
| cache type | write-through | Storage method in which data is written into the cache and the corresponding main memory location at the same time. The cached data allows for fast retrieval on demand, while the same data in main memory ensures that nothing gets lost if a crash, power failure, or other system disruption occurs. |
| write-back | During idle machine cycles, the data are written from the cache into memory or onto disk. Write back caches improve performance, because writing to the high-speed cache is faster than to normal RAM or disk. Using write-back cache for disks adds a slight amount of risk, because the data remain in volatile memory longer. | |
| size | {value} | Cache size in the corresponding units “MB”, “GB”. |
| storage_ref id
storage id |
{value}
{value} |
“Storage id” and “storage_ref id” should be the same for device type, but differ from 1, because the main device storage has this reference index. You can set this number to 3 or 4, for example. |
NOTE: Units and size values may differ from the ones provided in the above example.
4. Save the file(s).
5. Start the StarWind service.
Wait for synchronization to complete, then repeat the same steps on the other node(s).
