
How to extend Image File or High Availability device
- Maintenance
- April 23, 2015
- Download as PDF
Introduction
Highly available environments enable routine tasks and infrastructure-wide reconfigurations without interruption. For instance, expanding servers’ storage easily and without impacting production is one of the use cases where highly available (HA) shared storage shines. This KB article provides a guide for extending storage at every layer: from the StarWind CVM (Controller Virtual Machine) and Management Console to the resulting file systems in Windows Clusters, VMware vSphere, and Proxmox.
This KB article helps expand HA devices within the HA capacity allowed by a particular license. It can be used for non-interruptive allocation of the already existing storage capacity or new storage after RAID expansion.
NOTE: This KB article implies that the underlying physical or virtual RAID was already expanded, and CVM or Windows server Disk Manager snap-in correctly shows the new storage capacity.
Resizing StarWind CVM storage pool
Resizing a storage pool is a critical step after expanding the underlying storage. This section is applicable only to CVM and is a necessary step only if the underlying RAID, VMDK/QUEMU disk, or a raw device was expanded.
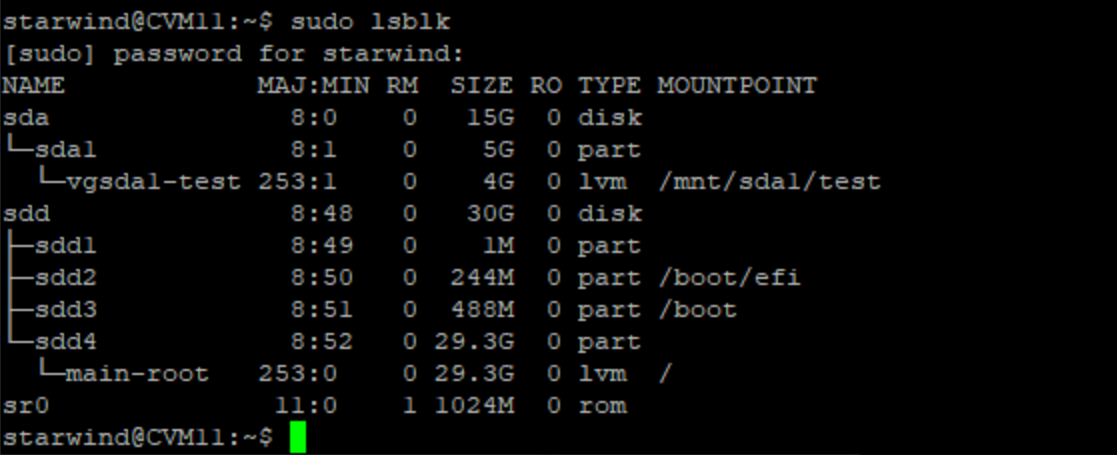
Connect through SSH terminal to StarWind VM and run the following commands:
- sudo lsblk – to identify the volume name, path, vgname, and lvname that contains StarWind devices and should be extended.
2. sudo systemctl stop starwind-virtual-san – to stop VSAN service

3. sudo umount /mnt/sdXX/volume_name – Unmount the volume with StarWind devices from its mount point.

4. sudo vgchange -an <volume group name> – Deactivate the volume group with StarWind devices.

5. sudo growpart /dev/<disk without partition> <partition> – Expand the StarWind devices partition on the disk to use the available space previously extended.

6. sudo /opt/starwind/starwind-san-and-nas-console/Scripts/hardware/hardware.py PvResize –device /dev/sdXX – Resize the physical volume to reflect changes in partition size.

7. sudo python /opt/starwind/starwind-san-and-nas-console/Scripts/hardware/hardware.py UpdateInitramfs – Updates the initial filesystem to include new hardware configurations.

8. sudo vgchange -ay vgsdXX – Activate back the volume group with StarWind devices.

9. sudo mount -a /mnt/sdXX/volume_name – Mounts filesystem with StarWind devices back.

10. sudo systemctl start starwind-virtual-san – Start the StarWind Virtual SAN service again
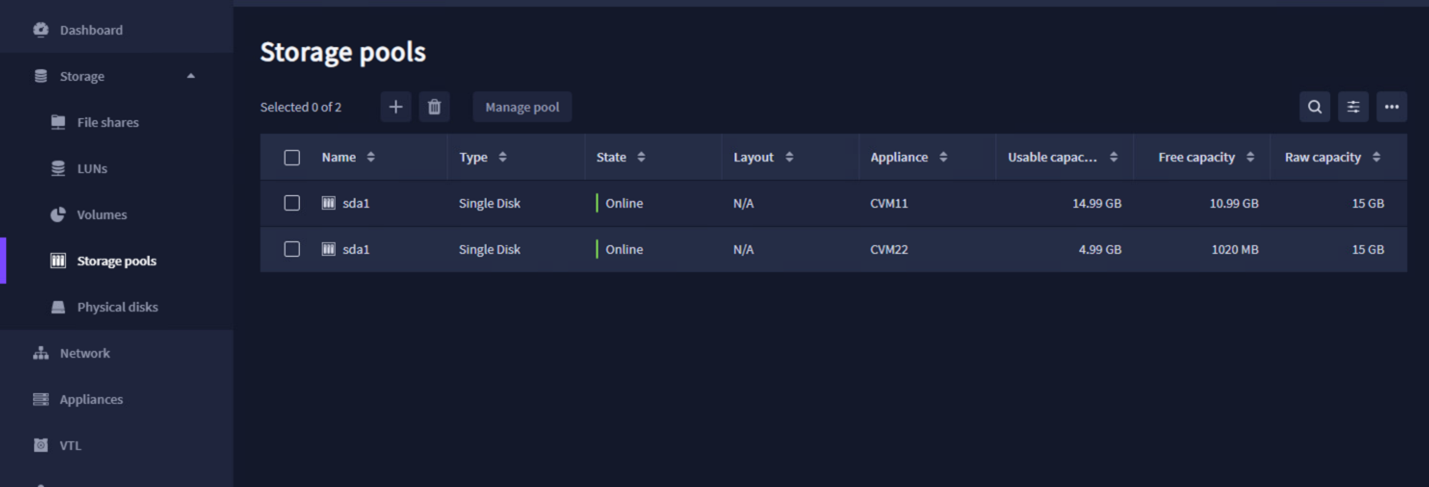
11. Open StarWind CVM Web UI, navigate to the Storage pools tab and check the reported size of the pool. Repeat the steps in this section on another StarWind CVM if required.
Extend HA device size in StarWind VSAN CVM Web UI
- To check the free space capacity on the storage pools, open the browser, log in to the StarWind CVM Web UI, and navigate to the Storage Pools tab.
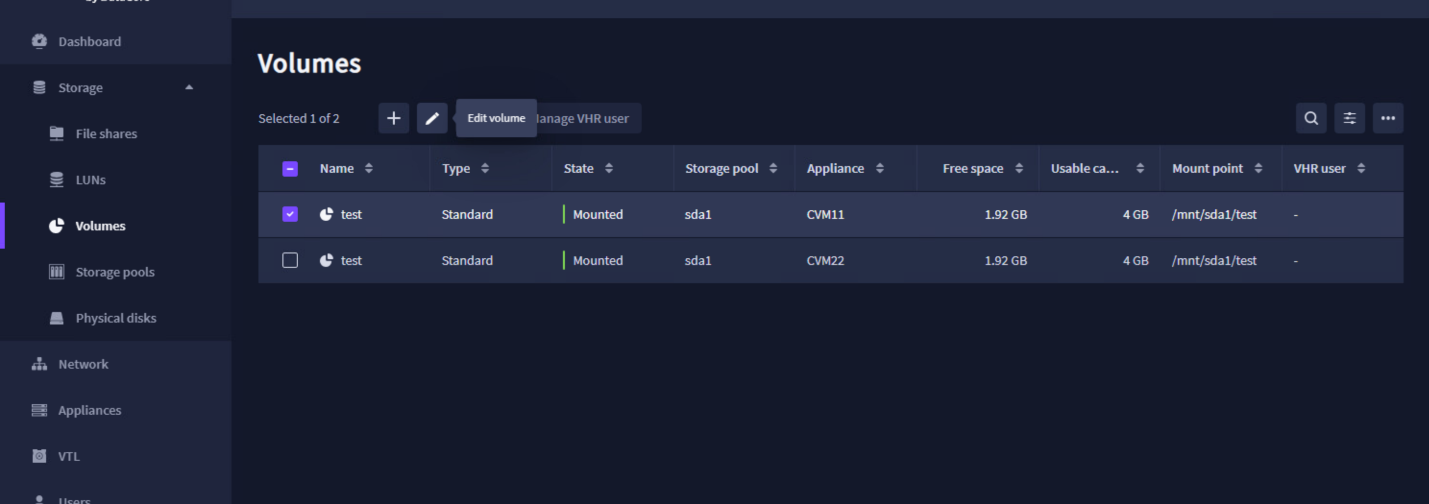
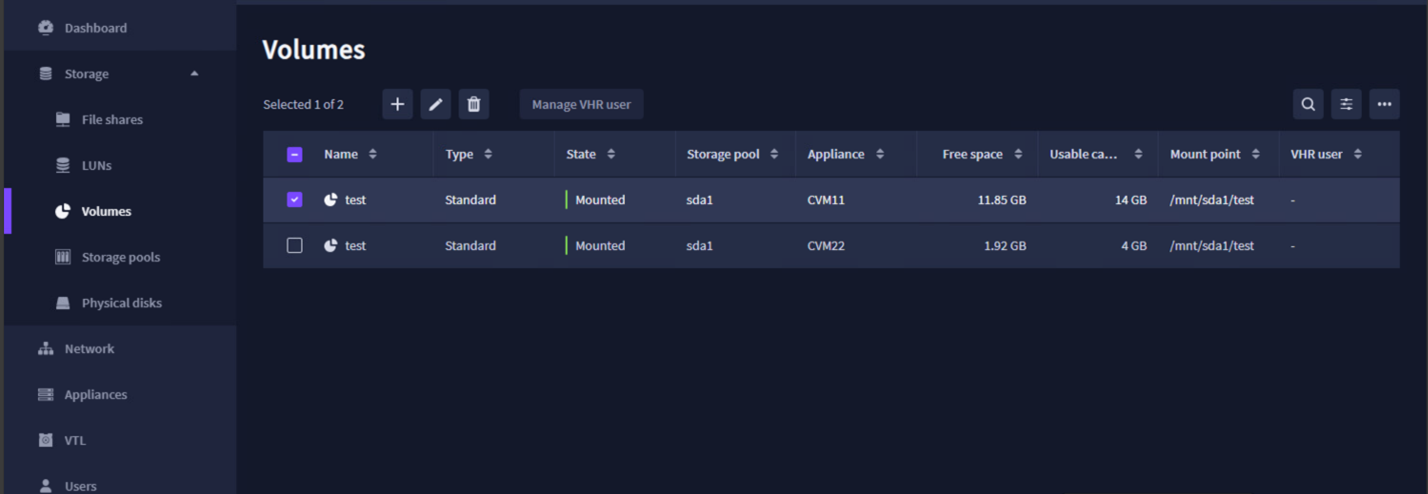
2. Open the browser and log in to the StarWind CVM Web UI. Navigate to the Volumes tab and press Edit volume to expand the volume(s) for each node.
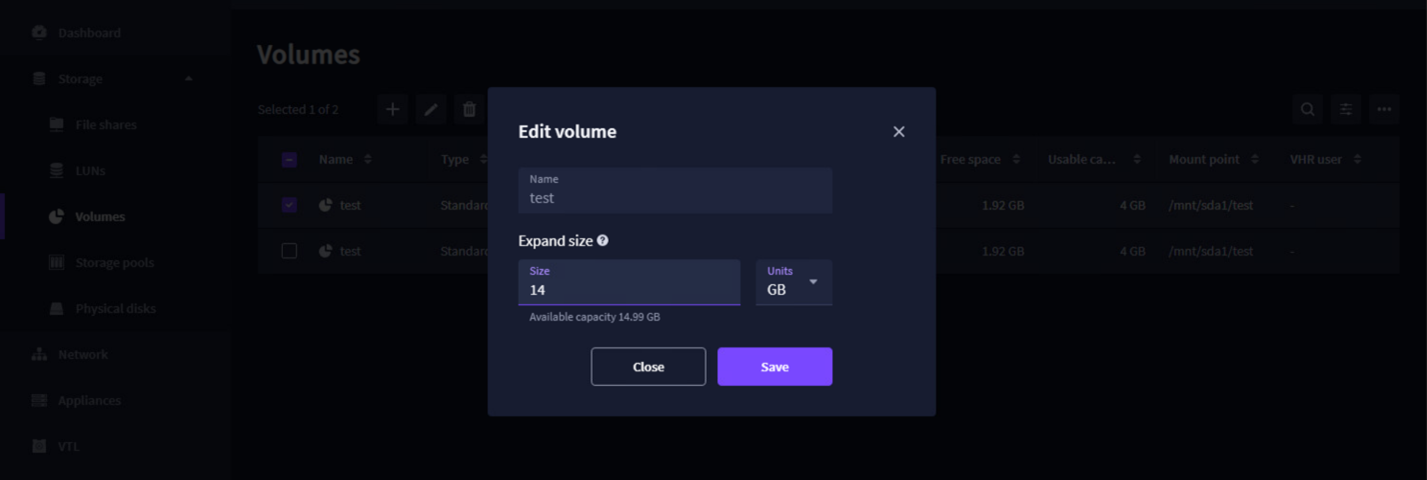
3. Specify the size to expand the volume. Press Save.
4. Check the result on the Volumes tab.
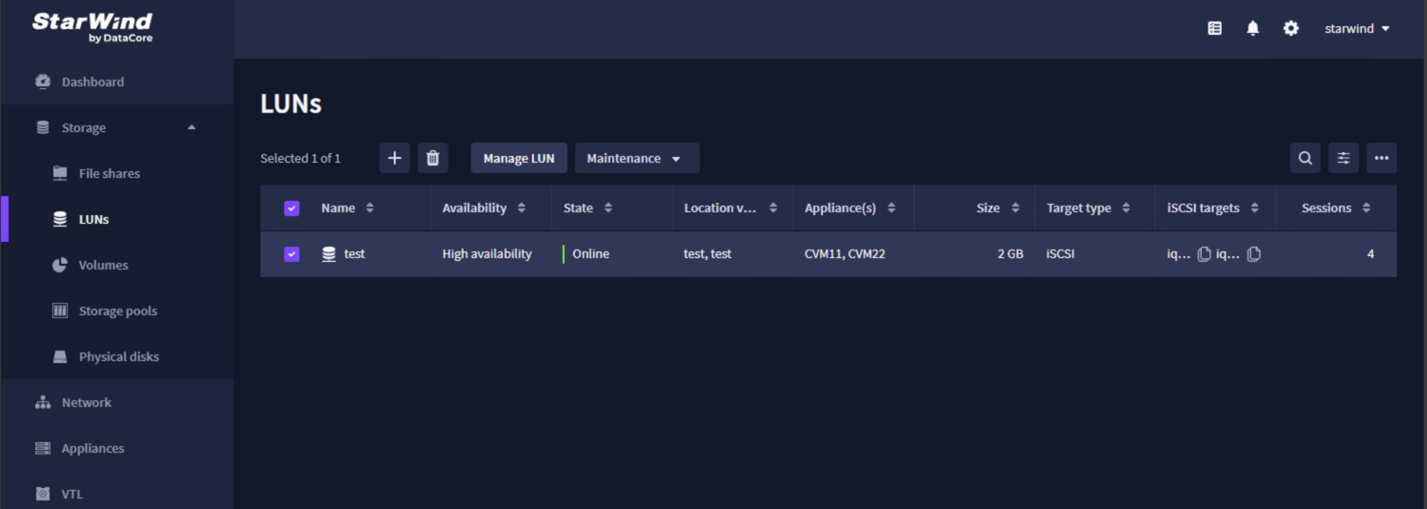
5. Navigate LUNs tab. Select the HA device and press Manage LUN.
6. Open the Storage section. Enter the expansion size.
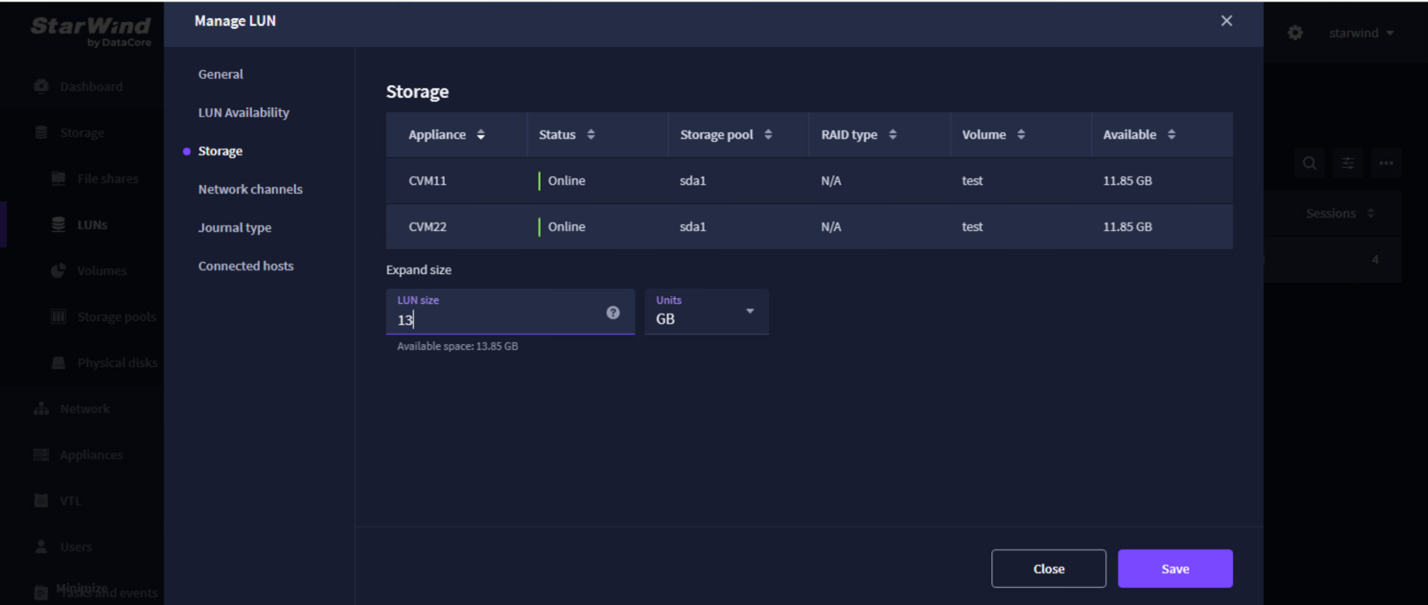
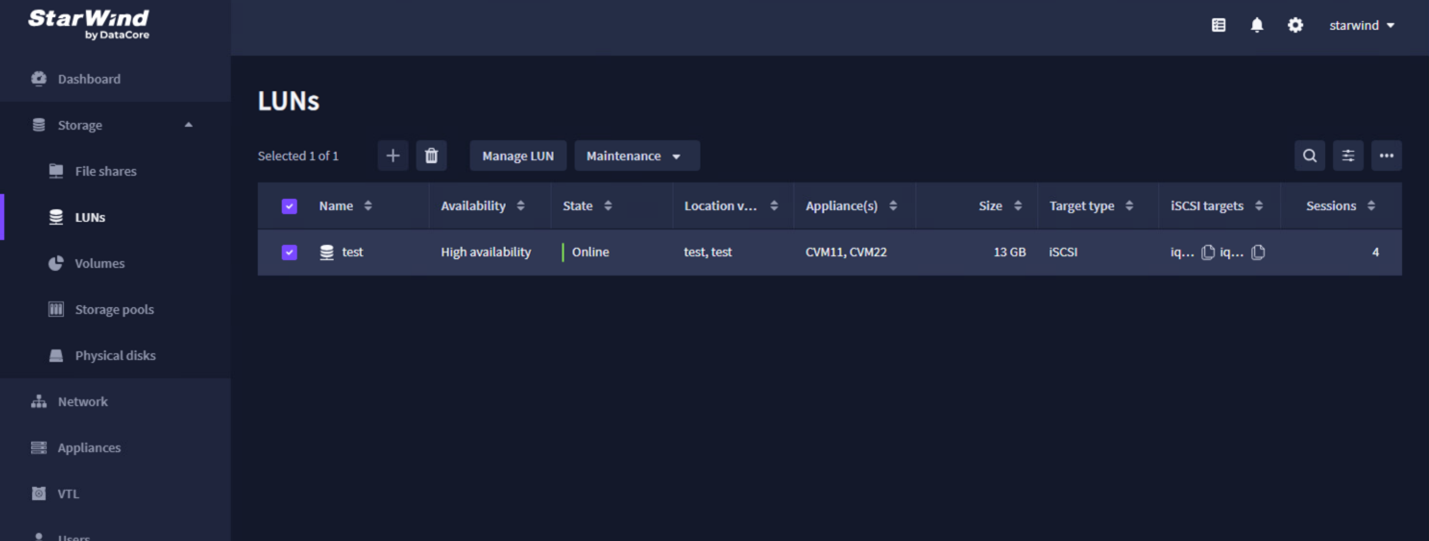
7. Press Save and check the result in the LUNs tab.
Extend HA device size in StarWind Management Console (Windows-based).
This section applies both to CVM and installations where StarWind VSAN is installed as a Windows application.
NOTE: If StarWind Management Console is used to extend a HA device presented by StarWind CVM, please make sure that there is free space on the storage pools on CVMs where Volumes are residing. If there is not enough space on the storage pool, please follow the steps in the section Resizing StarWind CVM storage pool.
NOTE: A StarWind HA device or a standalone device can only be extended, but cannot be shrunk.
Open StarWind Management Console and connect to one of the servers. Expand the target with an HA device, right-click the device that should be modified, and choose Extending Size of HA (High availability) Device/Image File Size.
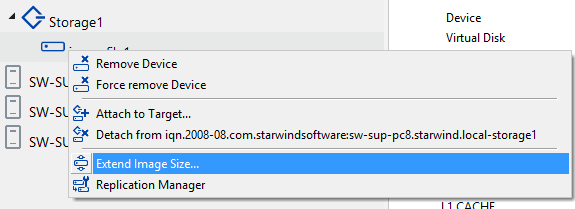
Then specify the disk space that you want to add and click the “Finish” button.
Alternatively, you can use the PowerShell script to extend the HA device. The script example is available in the StarWind installation folder. Default location is “C:\Program Files\StarWind Software\StarWind\StarWindX\Samples\powershell\ExtendDevice.ps1”
Extend CSV in Windows Cluster
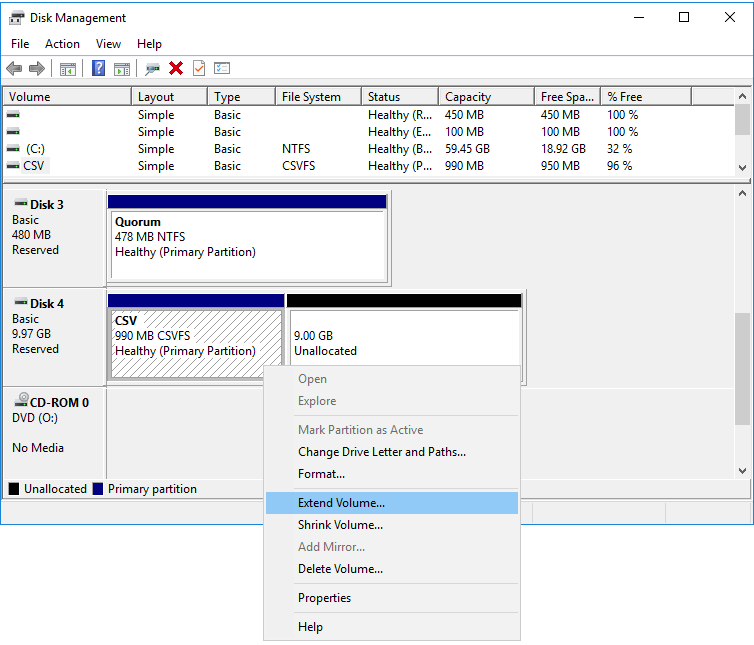
Once the StarWind device is extended, the corresponding physical drive will be extended. Since the StarWind image file emulates a physical drive and it has now grown, the partition on top of the image file needs to be extended as well.
NTFS (CSV) can be extended via Disk Management Console on a live production server with no downtime. This operation should be performed on the owner of the CSV.
- Open the Disk Management snap-in.
- Select the device that is to be increased.
- Right-click the volume.
- Extend volume.
Extend Datastore in VMware vSphere
VMFS can be extended by following the steps in this document: https://techdocs.broadcom.com/us/en/vmware-cis/vsphere/vsphere/8-0/vsphere-storage/working-with-datastores-in-vsphere-storage-environment/managing-vsphere-vmfs-datastores/increase-capacity-of-vsphere-vmfs-datastore.html
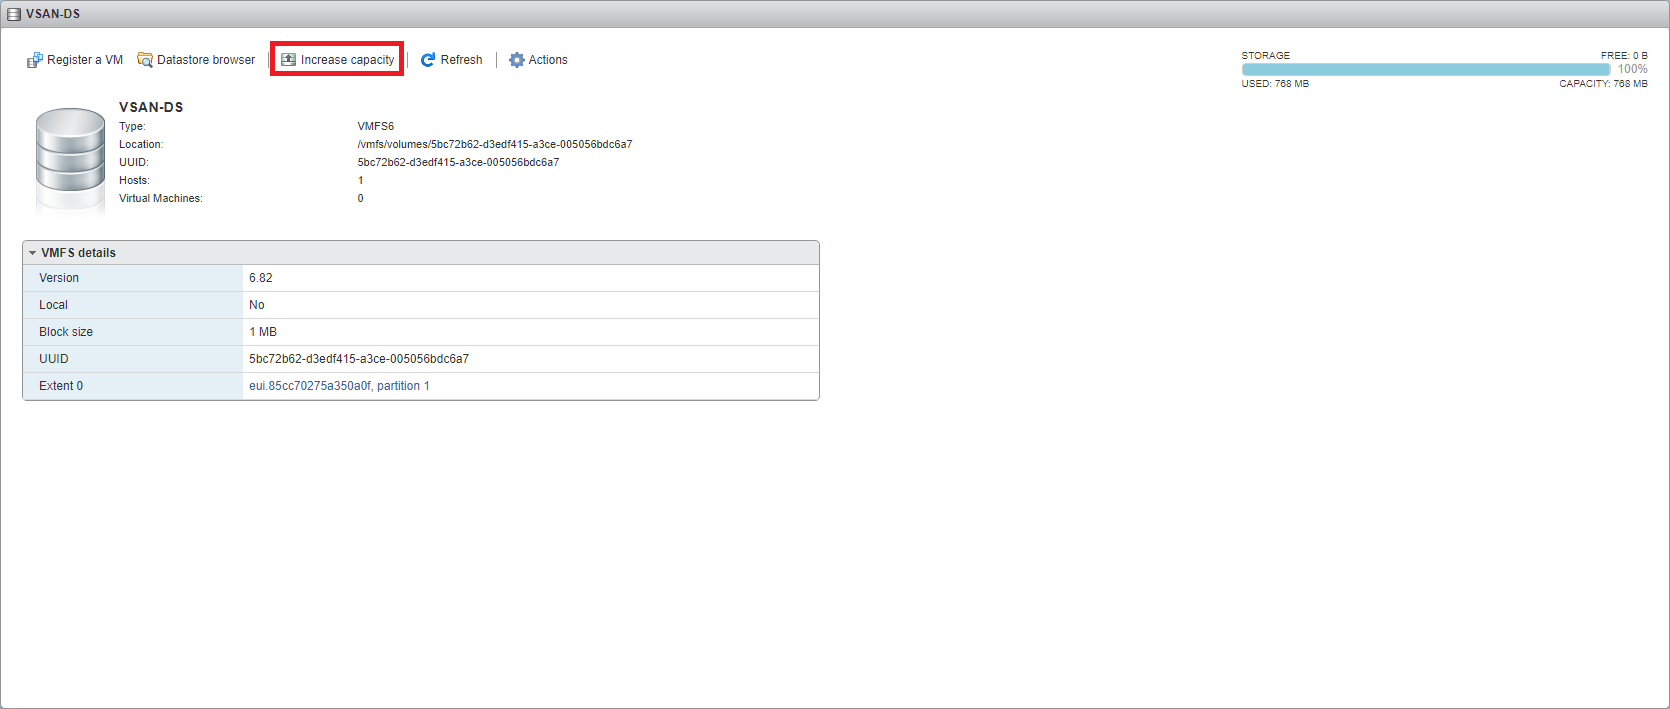
In VMware vSphere,
- open the Datastore view for a device that is backed by StarWind HA device that was extended.
- Click Properties.
- Press Increase and follow the wizard.
Extend Proxmox storage connected as a StarWind HA device
StarWind HA device connected in Proxmox can be extended by following the steps below:
- Log in Proxmox via SSH
- Run lsblk to show all available disks and understand which disk should be extended.

3. Run iscsiadm -m node -R
-m node – selects node mode to handle iSCSI target configurations.
-R – triggers a rescan to update available targets.

4. Run systemctl restart multipath-tools to restart the multipath-tools service and manage multipathing for storage devices, applying changes or refreshing device mappings
NOTE: Restarting multipath-tools is non-disruptive and safe for production. While the I/O is handled by the kernel, the service restart refreshes mappings without dropping connections. Run multipath -ll to confirm all paths are healthy; there is no need to migrate or shut down VMs.
5. Run pvresize /dev/mapper/mpathX to resize the volume

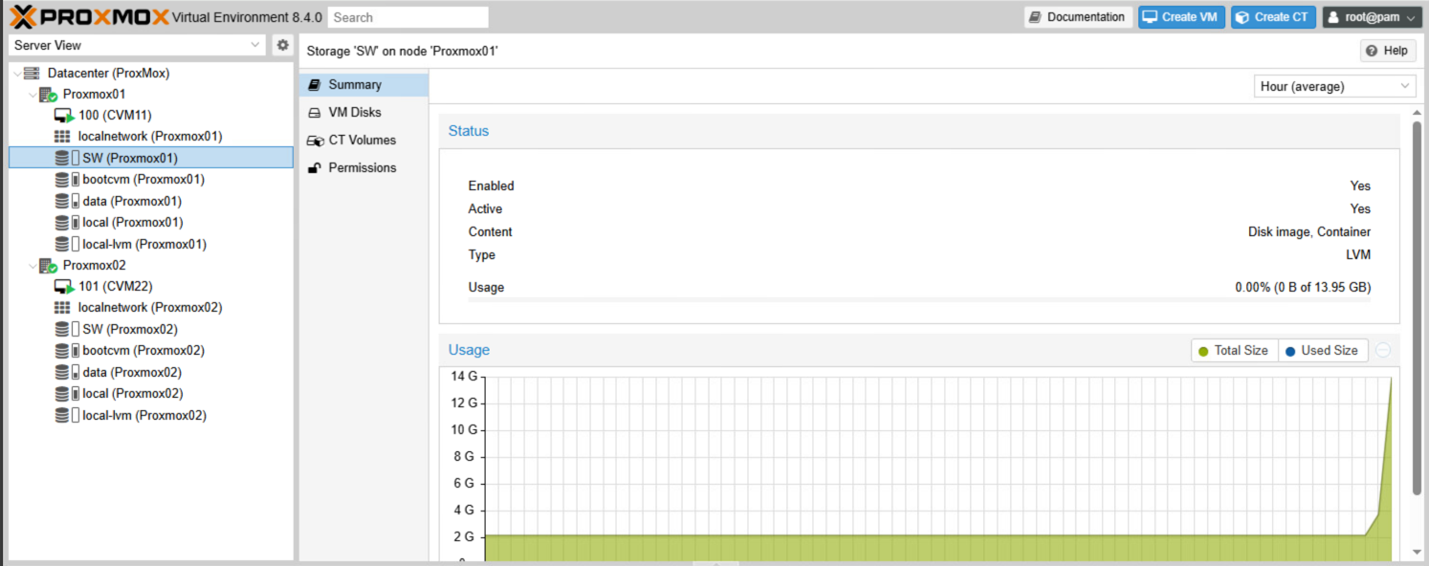
6. In Proxmox Web UI, select the storage corresponding to the StarWind HA disk and check if the size has been extended.
Conclusion
By following these procedures, administrators can extend HA storage provided by StarWind VSAN without compromising the environment’s uptime and performance.
This article helps with the initial expansion of the Storage Pool in StarWind CVM, the logical extension of HA devices via both the Web UI and the Windows Management Console, and the necessary final steps to reflect that new capacity within Windows, VMware, and Proxmox environments.
